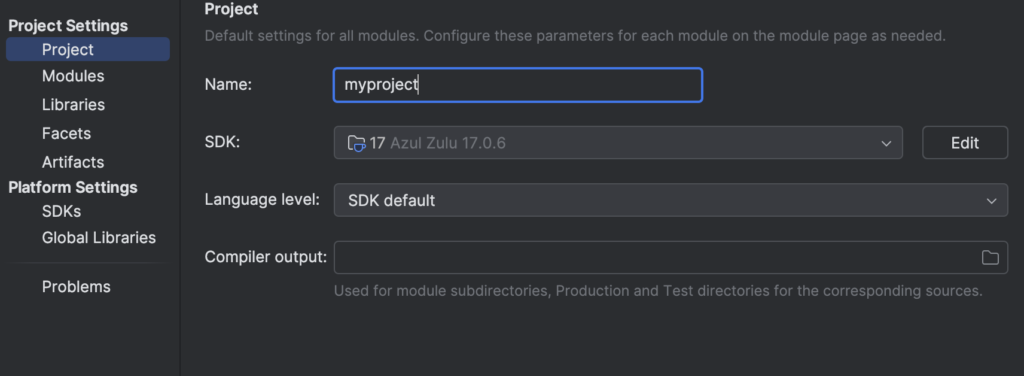
IntelliJ IDEA is a popular and powerful integrated development environment (IDE) for Java developers. One of the key features of IntelliJ IDEA is its ability to support multiple versions of Java. This allows developers to work with the latest Java features and APIs, or to use older versions of Java for legacy applications. In this article, we will discuss how to set the Java version in IntelliJ IDEA on both Mac and Windows operating systems.
On Mac
To set the Java version in IntelliJ on a Mac, follow these steps:
- Open IntelliJ and click on “Preferences” in the IntelliJ menu. Some Intellij version have this in Module Settings on project that shows up in the right click menu.

- In the search bar, type “SDKs” to find the “SDKs” section.

- Click on the “+” button at the top left corner of the window to add a new SDK.

- Select “JDK” from the dropdown menu and click on “Next”.
- In the “JDK home path” field, browse to the location where the Java version you want to use is installed. By default, Java is usually installed in the “/Library/Java/JavaVirtualMachines” directory.
- Select the Java version you want to use from the dropdown menu and click on “Finish”.
- In the “Project SDK” dropdown menu, select the Java version you just added.

That’s it! Now IntelliJ will use the Java version you selected for your projects.
On Windows
To set the Java version in IntelliJ on a Windows machine, follow these steps:
- Open IntelliJ and click on “File” in the IntelliJ menu.
- Click on “Project Structure” to open the project settings window.
- In the left-hand pane, click on “SDKs”.
- Click on the “+” button at the top left corner of the window to add a new SDK.
- Select “JDK” from the dropdown menu and click on “Next”.
- In the “JDK home path” field, browse to the location where the Java version you want to use is installed. By default, Java is usually installed in the “C:\Program Files\Java” directory.
- Select the Java version you want to use from the dropdown menu and click on “Finish”.
- In the “Project SDK” dropdown menu, select the Java version you just added.
- Click on “Apply” and then “OK” to save your changes.
That’s it! Now IntelliJ will use the Java version you selected for your projects.
Setting the Java version in IntelliJ IDEA is a simple process that can make a big difference in your development workflow. Whether you’re working on a new project or maintaining an older one, being able to switch between different Java versions can help you get the most out of your tools and libraries. By following the steps outlined in this article, you can ensure that IntelliJ IDEA is using the correct version of Java for your needs. So, next time you’re working on a Java project in IntelliJ IDEA, make sure you take advantage of this powerful feature!
Additionally, if you ever find yourself stuck on a Java assignment, don’t hesitate to seek help with Java homework to better understand how to implement Java effectively in your projects.